Campaign data can be viewed from the main Campaign screen.
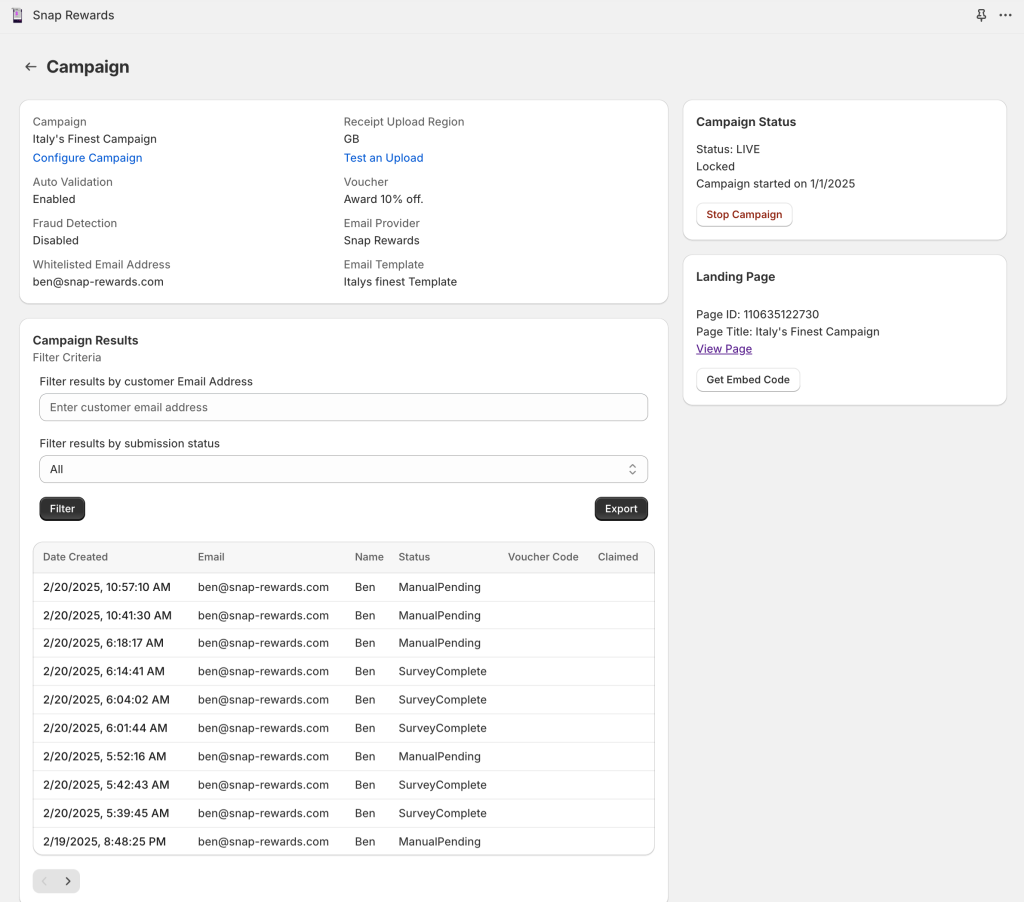
The Campaign Results section contains a list of all the submissions for the campaign with options to filter the list by email and status. These filters can be used to, for example:
- View a list of submissions requiring approval
- Find a specific submission by email address
- List all submissions that have had a voucher issued
- List all submissions that have had a voucher claimed
Data can be exported to CSV by clicking on the Export button. This will export the data based on the current filter criteria. To export all the data for a campaign simply set the filter to All
To view the details of a submission click on the Date Created field in the list of submissions and you will be taken to the Campaign Result screen. On this screen you can view all the details of the submission.
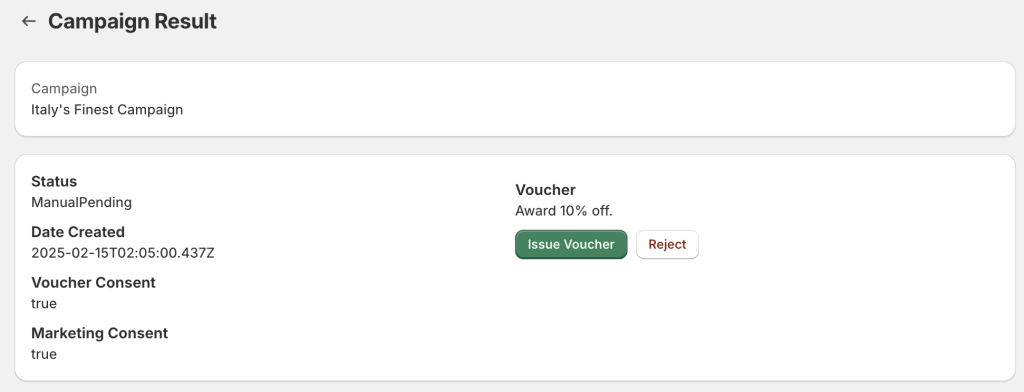
The above section shows the Status of the submission, the date it was created, Voucher Consent and Marketing Consent indicate that the customer checked the boxes on the submission form to consent to receiving the voucher and future marketing communication. The Voucher section shows the description of the voucher and buttons to Issue the voucher or Reject the submission.
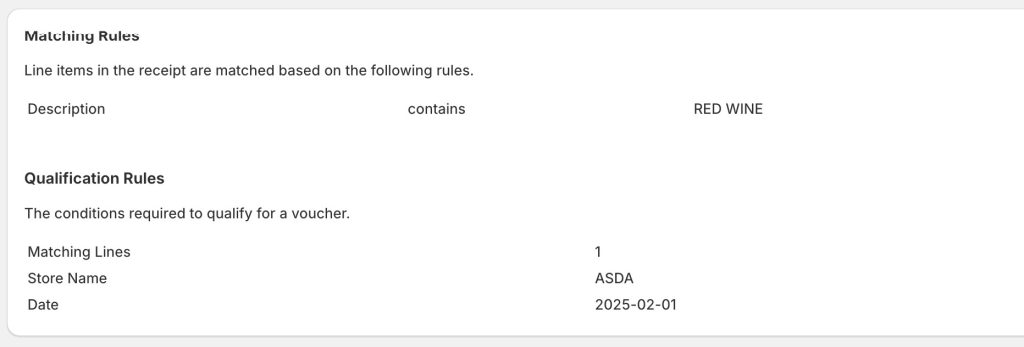
The above section displays the auto-validation rules for the campaign for convenience. These can be checked against the receipt below when performing a manual aproval.

The above section displays the customer data collected in the submission, in this case simple Email and Name.
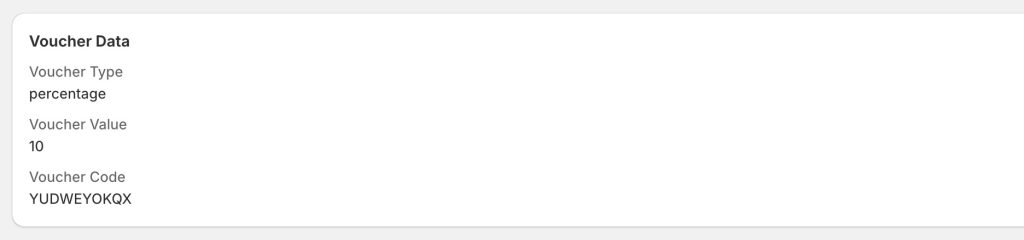
The Voucher Data section shows details of the voucher (once it has been issued) including the voucher code that was sent to the customer.
![]()
The above section shows all the details of the receipt that was uploaded, including all the data extracted by the automatic receipt scan.